
Updating Payer Profile and Initiating KYB Verification
To update the payer profile and initiate KYB verification, perform the following steps:
1. Navigate to the Payers dashboard.
2. On the All tab, select the payer you want to update the details for.
3. Click the  Ellipsis icon and select Update.
Or
Click to open the payer you want to update. On the payer Overview page, click Initiate KYB Verification. On the Payer Profile page, click the  Edit icon to update the payer profile.
Or
Click to open the payer you want to update. On the single payer dashboard, select Profile from the left panel, and then click  Edit icon to update the payer profile.
The Edit Profile page appears.
Note: The Initiate Your First Payment panel appears for each payer until their first bill is successfully created.
4. (Optional) Under Basic Information, update the business name and email address in the respective boxes.
5. Under Mandatory Details for Making Payments, enter the Employer Identification Number (EIN) in the EIN box.
6. Enter the phone number in the Phone Number box.
7. Select the business type from the Business Type list.
8. Select either the Business Description or Website URL option and then enter the business description or URL.
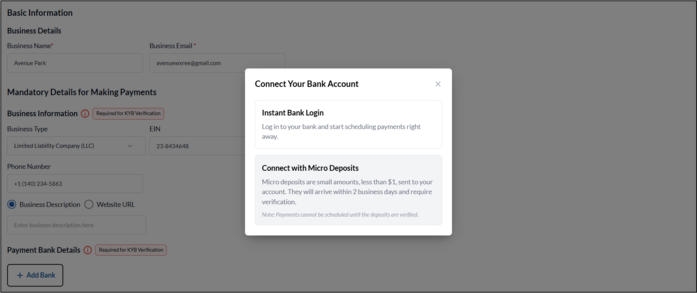
9. Under Payment Bank Details, click  Add Bank, and then perform the following steps to add bank details:
-
If you select Instant bank Login, follow the on-screen instructions to log in to your internet banking account and add your bank details.
-
If you select Connect with Micro Deposits, perform the following steps:
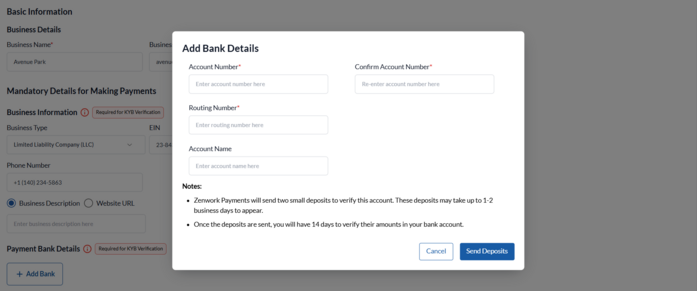
i. On the Add Bank Details dialog box, enter your account number in the Account Number box.
ii. Re-enter your account number in the Confirm Account Number box.
iii. Enter the routing number in the Routing Number box.
iv. (Optional) Enter the account holder name in the Account Holder Name box.
v. Click Send Deposits.
The bank is added and displayed on the screen.
vi. Click Complete Verification.
vii. On the Verify Bank Account dialog box, enter the micro deposit amounts you received to verify your account.
viii. Click Verify Account.
The bank account status changed to Verified.
10. Under Business Address, enter the address details, including Address Line, City, State, ZIP Code, and Country.
11. Under Representative Details, click Add Representative, and then perform the following steps:
a. On the Representative Information dialog box, enter the first, middle, and last names in the respective boxes.
b. Select the date of birth from the Date of Birth calendar.
c. Enter the SSN in the SSN box.
d. Enter the email address in the Email box.
e. Enter the phone number in the Phone Number box.
f. Under Address Details, enter the address details, including Address Line, City, State, ZIP Code, and Country.
g. Turn on the This person is a company controller toggle if applicable and specify their job title.
h. Turn on the This person is a company owner toggle if applicable and specify the percentage ownership.
i. Click Add Representative.
12. Click Save.
The Initiate KYB Verification dialog box appears.
13. (Optional) Click I’ll do it later to skip the Know Your Business (KYB) verification process and save the payer details.
14. Click Initiate KYB to start the KYB verification process for the payer.
The KYB is initiated successfully, the payer details update, and the status changes to Pending.
Note: It takes between 10 minutes and 2 working days to complete the KYB verification process.