
Importing Payer and Vendors from QuickBooks Desktop
To import payers and vendors from QuickBooks Desktop, perform the following steps:
1. Navigate to the Zenwork Payments platform.
2. Click the QuickBooks Online tile.
Or
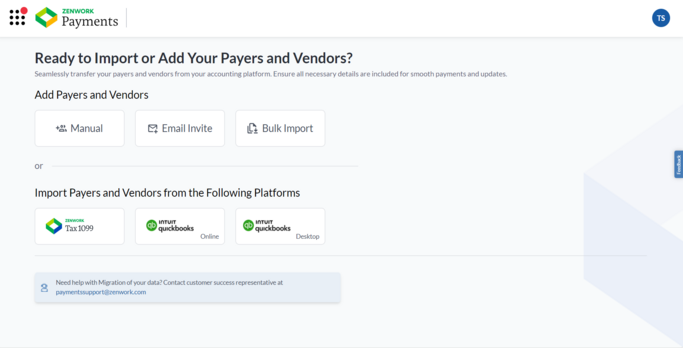
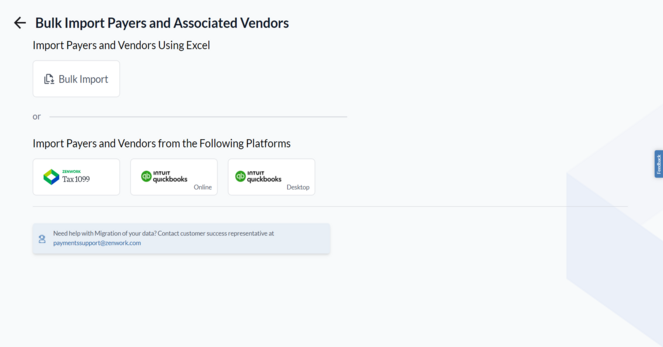
From the Payers dashboard, click to expand Add Payer, and then select Bulk Import. Under Import Payers and Vendors from the Following platforms, click the QuickBooks Desktop tile.
Note: You must create at least one payer and complete the subscription process to view the Payers dashboard.
The QuickBooks Desktop Web Connector Setup page appears.
3. Follow the on-screen instructions to download and set up the QuickBooks Web Connector file.
Note: Zenwork Payments currently supports a direct integration with QuickBooks Desktop for Windows. QuickBooks Desktop for Mac is not supported at this time. Refer Intuit Documentation for more information.
The Import Payer and Associated Vendors from QuickBooks Desktop page appears, displaying the selected Payer with the list of associated Vendors.
4. Under Payers Details and Vendor Records, correct any incorrect information or fill in the missing details by clicking the  Edit icon.
5. (Optional) Turn on the Show Rows with Errors toggle to view the vendors with pending fixes.
6. (Optional) Click the  Filter icon to filter the vendors by Active and Inactive statuses.
7. Select the vendor(s) you want to add, and then click Import.
The confirmation dialog box appears.
8. Click Proceed.
The Payments page appears.
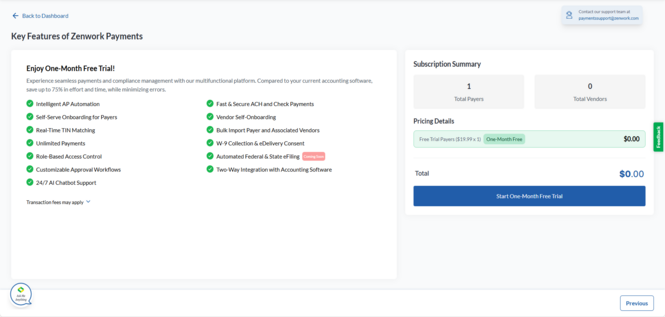
Note:
-
Start One-Month Free Trial appears for newly added payers who haven’t subscribed before, as well as for re-subscription payers.
-
Proceed to Pay appears when previously unsubscribed payers are manually added back for re-subscription.
9. Verify the subscription fee details and click Start One-Month Free Trial.
The Set Up Your Payments page appears.
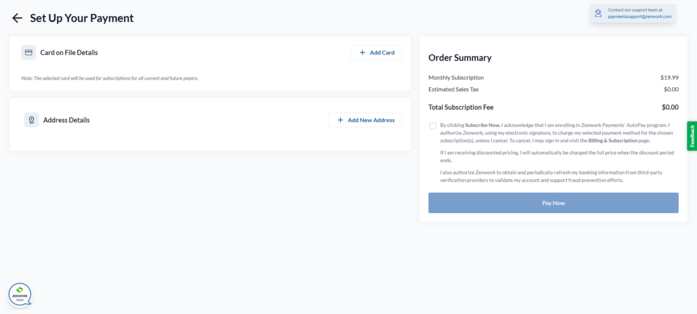
10. Select a credit card from the available cards or click Add New Card to add a new one.
11. Select an address from the available addresses or click Add New to add a new address.
12. Read the terms, select the check box, and then click Pay Now.
The Payer, its associated Vendors, Bills, and Chart of Accounts (COAs) are successfully imported.